Section 15: Install Router into Mount

Section 15a: Supplies Needed
- Parts Needed:
- DWP611 Router
- Tools Needed:
- #2 Phillips head screw driver
Section 15b: installing the router
YouTube Bookmark: https://youtu.be/jbYK1Pekhf0?t=2774
Grab the Z coupler
Rotate the coupler while applying downward pressure on the Z plate until it is all the way down
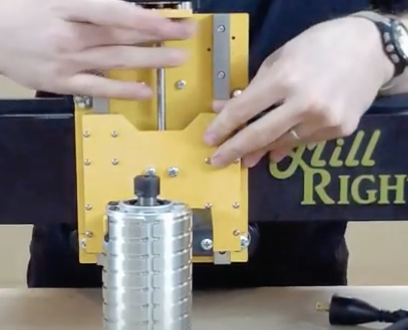
Pick up the router and place it into the opening of the router plate
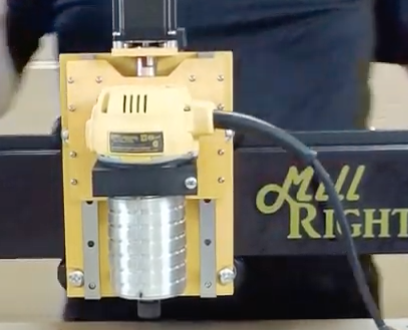
Have the power cord of the router facing to the right
rotate the coupler the opposite direction lift it up to the router you are holding
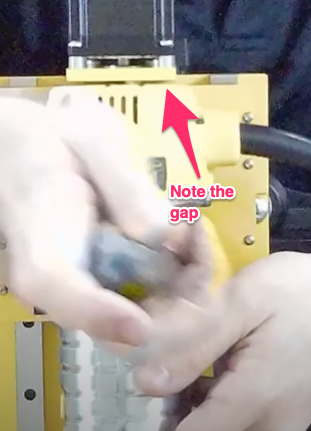
Keep rotating the coupler until it is just in contact with the U indent at the top of the Z Plate
Now lift up the router until it is just below the motor mount plate (approx 1/16”)
Using the Phillips Head Screw driver tighten the pinch bolt in the front of the router plate

Note
The router power cable looks like you could route it in the drag change. Don’t do it! The power flowing to the router can cause signal noise in the homing sensors and other electronics. Keep them far apart.
Section 15c: Initial squaring and tramming
YouTube Bookmark: https://youtu.be/jbYK1Pekhf0?t=2873
- Take a speed square and place it on the bed
- Position the square on the front of the router and then each side and verify the router is at a right angle to the bed
Note
Brad Ellerbroek’s tramming plate is a big help with this and was mentioned in Section 3f: Option 2 - Using Brad Ellerbroek tramming plate modification..
- If it isn’t square loosen the pinch bolt and reseat the router then tighten the pinch bolt
Warning
This can be a maddening process that takes a lot of time if you try to be a perfectionist.
- Derek mentions a tramming video on the MillRight boards. It can be found here
- As an alternative to Derek’s instructions in the video, Winston Moy has a great tramming video for a competing CNC but its totally applicable to the Mega V. Please watch it https://www.youtube.com/watch?v=rGOGlNurglE
- I found this video on CNCNuts recently which I found helpful in tramming YouTube
- A 3d printable tram arm can be downloaded at https://www.thingiverse.com/thing:4037880
This section will be greatly expanded in the future.