Section 13: Install X and Y Motors
Section 13a: Supplies Needed
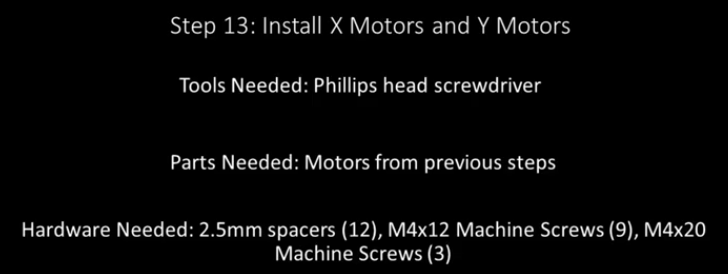
Parts Needed:
X Motor (1) Note will be the same as the Y Motors if you have a 19” Mega V
Y Motors (2)
2.5mm spacers (12)
M4x12mm Machine screws (9)
Note
Socket cap screws can be substituted to minimize risk of stripping
M4x20mm machine screws (3)
Tools Needed:
- #2 Phillips head screw driver
Section 13b: Install the Y motors
YouTube Bookmark: https://youtu.be/jbYK1Pekhf0?t=1760
Warning
Check the length of your motor cables. For the 19” all for are 2550mm for the 35” machine the X and Z are 3750mm and the 2 Y’s are 2550mm
Place 4 2.5mm spacers on the Y motor mount
Slide the gantry all the way forward so that the V-Wheels touch the Y end plates
Slide the toothed gear rack forward so the gear teeth will be able to engage the motor in this position ensuring the gantry has full freedom of travel
Note
You may need to loosen the gear rack screws in order to slide it around
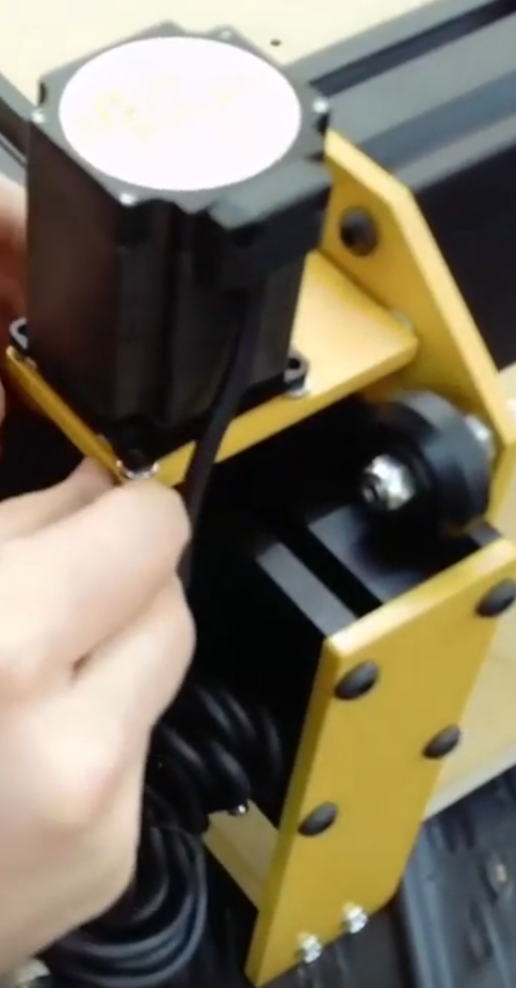
Tilt the motor as you insert the pinions into the hole in the Y motor mount plates and rotate the pinion to mesh it with the teeth of the gear rack seating the motor onto the 4 spacers at the same time.
Confirm that the gear rack is still in the right position to ensure maximum gantry travel a few teeth after the pinion is good.
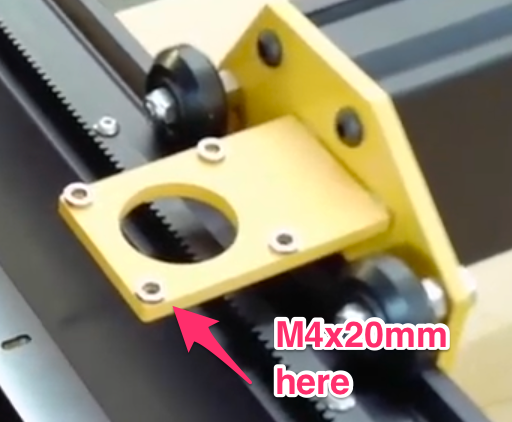
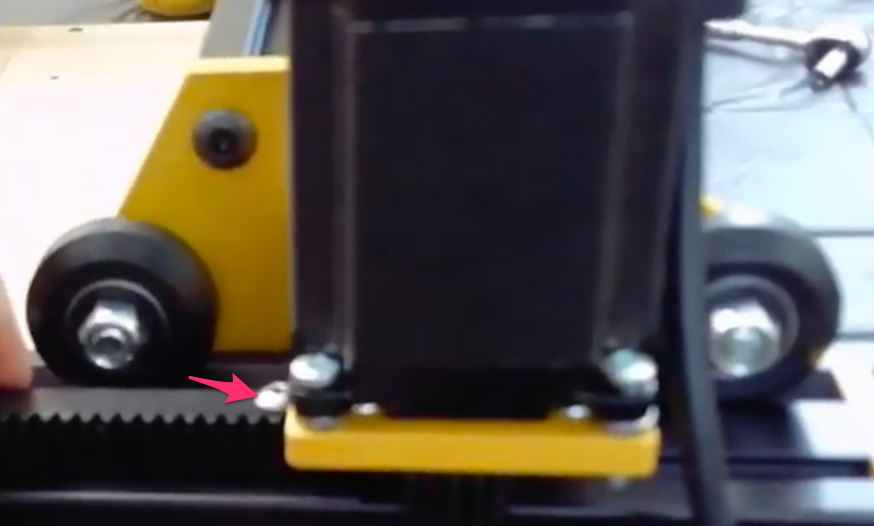
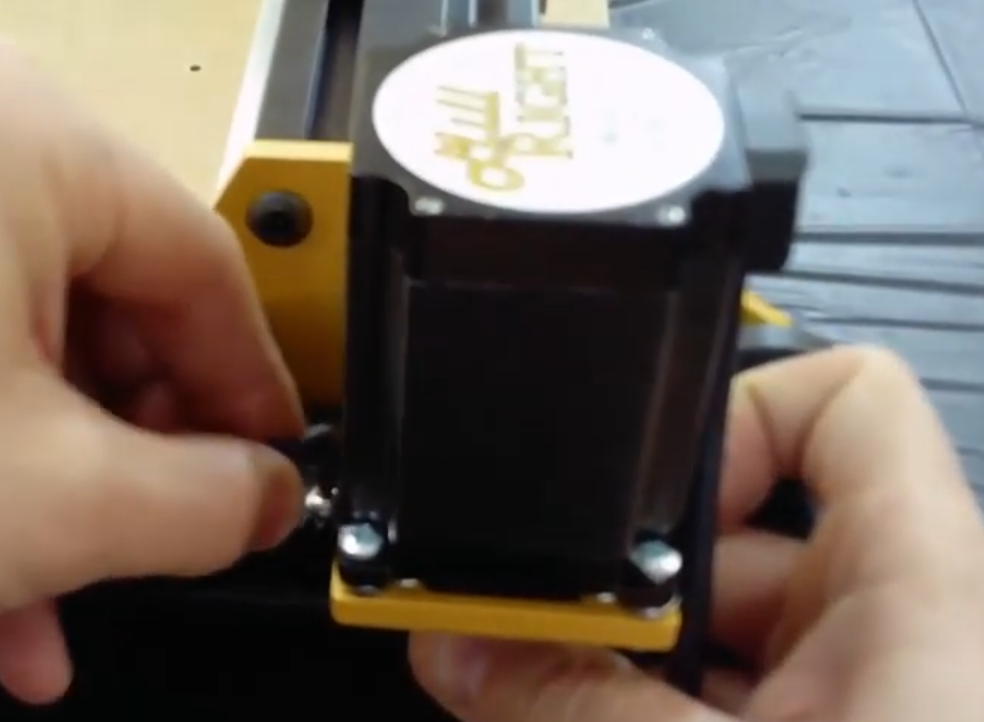
Using 3 M4x12 machine screws and 1 M4x20mm machine screw secure the motor to the motor plate with the wires pulled forward
Note
Make sure the m4x20mm screw goes in the outside front spacer.
Loosely tighten the screws to get everything positioned
Position the gantry so that you can just get a hex key in to tighten the gear rack screw
Pull the gear rack toward the outside of the rail and ping the pinion gear to the gear rack
Secure the screw in the gear rack
Get it snug but not completely torqued so you can adjust the rest of the gear rack
Slide the gantry up to the next screw in the gear rack
Warning
Don’t get your fingers pinched in the pinion
Repeat steps 9-13 for all remaining screws (4 in total for 19x19, 7 for 35x35)
Slide the gantry to the front machine
Move the gantry the length of the rail and make sure the pinion doesn’t hit the rail at any point
If it does hit the rail then you have too much space between your pinion and motor. You will need to go back to section 12 and reseat the pinion
Repeat all of steps 1-17 for the other Y motor
Section 13c: Install the X motors
YouTube Bookmark: https://youtu.be/jbYK1Pekhf0?t=2080
Install the 4 2.5mm spacers into the plate
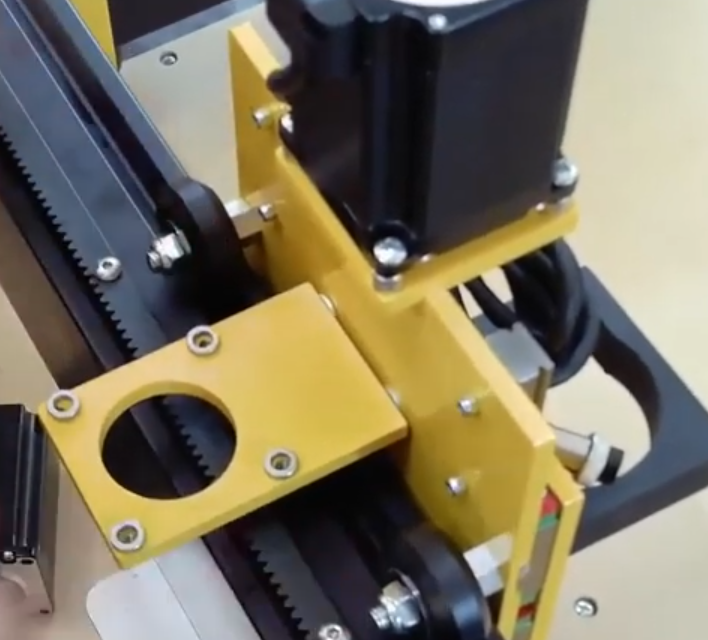
Orient the motor such that the wire will be facing the right side of the machine if looking from the front
Tilt the motor into the hole and rotate the pinion to mesh with the gear rack
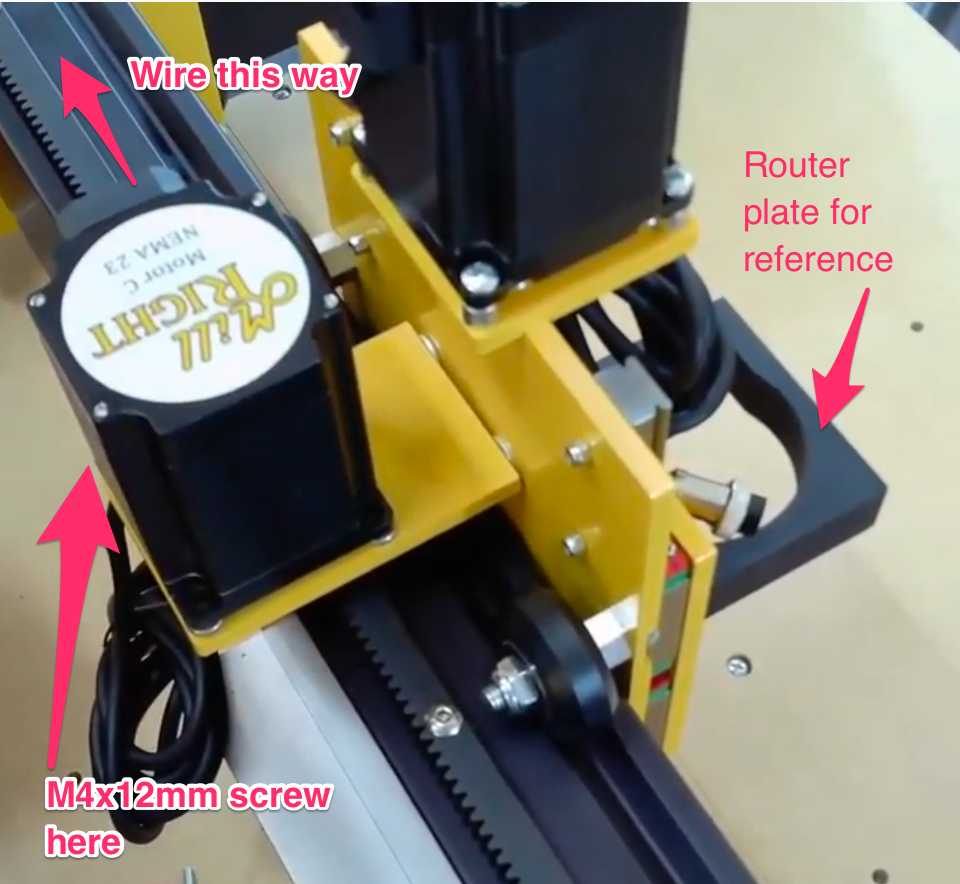
Using 3 M4x12 machine screws and 1 M4x20mm machine screw secure the motor to the motor plate with the wires pulled forward
Note
Make sure the m4x20mm screw goes in the outside front spacer.
Loosely tighten the screws to get everything positioned but with a little play
Slide the Z gantry all the way tot he end of the rail
Full the gear rack forward and pinch the the rack and pinion together
tighten the screw in the gear rack
Slide the gantry to the next gear rack screw and repeat the process for all 7 screws