Section 7: Install the Y End Plates
Section 7a: Supplies needed
Parts Needed:
- Y End Plates (4)
#2. 5/16”x3/4” Button Cap Screws (16)
Tools Needed:
- 5/16” Hex key
Section 7b: Installing the Y End Plates
YouTube Bookmark: https://youtu.be/ZkZot-WJXo8?t=3277
Optional: In the spirit of tire thieves the the world over, your life will be much easier if you put equal sized wood blocks under the rails to elevate it off of the bench
The Y end plates are all identical. The author did have 2 of theirs delivered with damaged powder coating so they recommend using the “nice” looking ones in the front and hide any damaged ones in the rear.
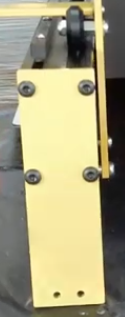
First do the front end plates
Align the plates to the predrilled holes in the rail
Optionally use loktite
Get 4 screws finger tight
In order to avoid the plate canting, gradually tighten each screw alternating between the 4 until they are firmly torqued in place
Repeat for the other front end plate
For the rear plates at this time you do not want to do final torquing so hold off on loktite. They need to be loose to enable installing the aluminum bed in future steps
Align the plates to the predrilled holes in the rail
Get 4 screws finger tight with about 1/4” of wiggle left in the plate
Repeat for the other rear plate
CONGRATULATION! You’ve reached the half way point and if following along on YouTube the end of video 1.